repair woven chair seat are a popular type of seating that can be found in many homes. They are known for their comfort and durability, but over time, the woven seat can become worn or damaged. repair woven chair seat can seem daunting, but with the right tools and techniques, it can be a simple process. In this blog post, we will discuss how to repair woven chair seat and provide step-by-step instructions to guide you through the process.
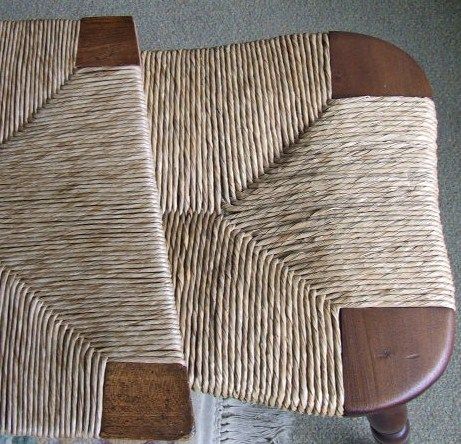
Before we dive into the steps of repair woven chair seat, let’s first go over the different types of woven seats that are commonly found in chairs. The most popular types of woven seats are cane, rush, and splint. Cane seats are made from the bark of the rattan palm and are commonly found in traditional chairs. Rush seats are made from twisted cattail leaves and are often found in more rustic chairs. Splint seats are made from thin strips of wood and are typically found in antique chairs.
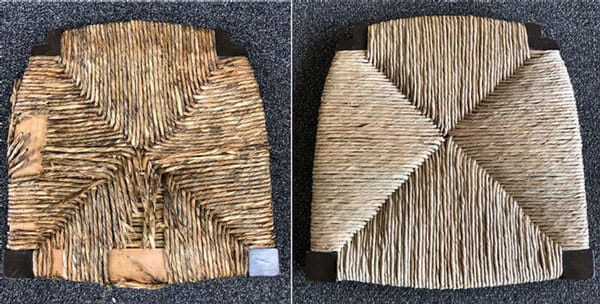
Regardless of the type of woven seat, the process for repairing them is similar. The first step is to assess the damage to the seat. Look for any broken or missing pieces of cane, rush, or splint. If the damage is minor, you may be able to repair the seat yourself. However, if the damage is severe, it may be best to take the chair to a professional furniture repair shop.
Once you have assessed the damage to the seat, it’s time to gather the necessary tools and materials. You will need a few basic tools, such as a pair of pliers, scissors, and a knife. You will also need some replacement cane, rush, or splint, depending on the type of seat. You can find these materials at most craft stores or online.
Step 1: Remove the damaged cane, rush, or splint
The first step in repair woven chair seat is to remove the damaged material. Use a pair of pliers to carefully remove the broken or damaged pieces of cane, rush, or splint. If the material is still intact but has become loose, gently push it back into place.
Step 2: Soak the new material
Before you can weave the new material into the seat, you will need to soak it in water for several hours. This will make the material more pliable and easier to work with.
Step 3: Weave the new material into the seat
Once the new material is soaked, it’s time to weave it into the seat. Start by weaving the new material under and over the existing strands of cane, rush, or splint. Make sure to pull the new material tight as you weave to ensure a secure fit.
Step 4: Continue weaving
Continue weaving the new material into the seat until you have covered the damaged area. Depending on the size of the damaged area, you may need to use several pieces of replacement material to cover it.
Step 5: Trim the excess material
Once you have woven the new material into the seat, trim any excess material with a pair of scissors or a knife. Make sure to leave enough material to tuck under the existing strands of cane, rush, or splint to secure the new material in place.
Step 6: Let the seat dry
After you have completed the repair, let the seat dry completely before using it. This will ensure that the new material is securely in place and will not come loose over time.
how to repair woven cane chair seat
Woven cane chair seats are a popular type of seating that can add an elegant touch to any room. Over time, however, the cane may become worn or damaged, causing the seat to lose its support and comfort. Fortunately, repairing a woven cane chair seat is a relatively easy process that can be done with a few basic tools and materials. In this blog post, we will provide step-by-step instructions on how to repair a woven cane chair seat.
Step 1: Assess the Damage
The first step in repairing a woven cane chair seat is to assess the damage. Look for any broken or missing pieces of cane. If the damage is minor, you may be able to repair the seat yourself. However, if the damage is severe, it may be best to take the chair to a professional furniture repair shop.
Step 2: Remove the Damaged Cane
The next step is to remove the damaged cane. Use a pair of pliers to carefully remove the broken or damaged pieces of cane. If the cane is still intact but has become loose, gently push it back into place.
Step 3: Prepare the New Cane
Before you can weave the new cane into the seat, you will need to prepare it. Soak the new cane in warm water for about 30 minutes to make it more pliable and easier to work with.
Step 4: Weave the New Cane into the Seat
Once the new cane is soaked, it’s time to weave it into the seat. Start by weaving the new cane under and over the existing strands of cane, making sure to pull the new cane tight as you go. Make sure to follow the same pattern as the original weave.
Step 5: Continue Weaving
Continue weaving the new cane into the seat until you have covered the damaged area. Depending on the size of the damaged area, you may need to use several pieces of replacement cane to cover it.
Step 6: Finish the Repair
Once you have woven the new cane into the seat, use a pair of scissors to trim any excess cane. Then, tuck the ends of the new cane under the existing strands of cane to secure it in place. Use a damp cloth to wipe away any excess glue.
Step 7: Let the Seat Dry
After you have completed the repair, let the seat dry completely before using it. This will ensure that the new cane is securely in place and will not come loose over time.
In conclusion, repair woven chair seat is a simple process that can be done with just a few basic tools and materials. Whether you have a cane, rush, or splint seat, the process is similar. By following these steps, you can restore your woven chair to its former glory and enjoy many more years of comfortable seating. Remember, if the damage
Repairing a woven cane chair seat is a simple process that can be done with just a few basic tools and materials. By following these steps, you can restore your woven cane chair to its former glory and enjoy many more years of comfortable seating. Remember, if the damage is severe, it’s always best to seek professional help.